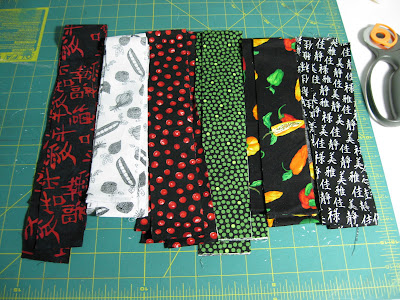
Begin by cutting strips 2 inches wide by at least 18 inches long.
I have multiples of each color here because I'm making multiple pot holders.

Sew your strips together with a quarter-inch seam and press the seams all in one direction. Trim the top and bottom edges even after sewing.

Trim your strips so that you have one piece that measures 9 1/2 inches by 10 inches, and one piece that measures 9 1/2 inches by 7 inches.

To the 9 1/2 by 7 inch piece, attach a 2 inch strip at the top and bottom. Press the seams toward the 2 inch strip.

You should now have two blocks measuring 9 1/2 inches by 10 inches. In the picture above, the back, and the front.

Now cut three layers of batting at the same measurement as your blocks. I use Hobbes Heirloom, and I have so many scraps that this project is an ideal way to use them up.
If you're smart, you will also include two layers of heat-resistant fabric which is pretty easy to find in the States, but I didn't even try to locate any in Singapore.

Pin and baste stitch all three layers of the batting to one of your blocks.

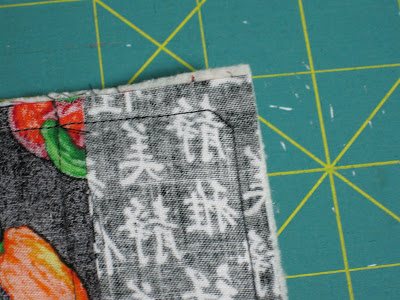
Your basting should be at a scant 1/8th inch so that it wont show through when the final 1/4 inch seam is sewn.

For the next step, you will need 5 inches of double-fold bias binding tape in a coordinating color. Make a loop and sew diagonally across the edge of the tape at a corner of your basted block, sewing back and forth several times to make a strong connection.

Pin the other pieced block right sides together to the basted block and stitch at 1/4 inch, leaving an opening for turning at the bottom of the block. Need I say it? You should always lock your stitches at the beginning and ending of every seam, and that is particularly important when you have a project that you have to turn to right side.
And one more thing:

Sew diagonally across the corners for 3 or 4 stitches to make the corners really nice when you turn them.
Now clip the corners and turn the pot holder right side out. Press.

Carefully fold under the open seam at the bottom and pin.

Stitch across the opening at a scant 1/8th inch. Press. Quilt as desired. I stitched in the ditch on the front.

Finished pot holder:front

Finished pot holder: back
I hope these instructions are clear and I didn't leave out any vital information, like how much flour to add to the cookie dough recipe. Please let me know if you make any pot holders from this pattern and how the instructions worked for you! Good luck!


7 comments:
You are SO sweet. Thank you SO much for responding to overwhelming one person's request so quickly. I know you treasure your readers. The step by step instructions are so neat, so clear. I shall try soon. One thing was missed, the one of a kind teacher herself. Miss you!!
I think this is so darling that I must make some for myself and as gifts for my myriad friends, or not.
It's hard to concentrate on the pot holders cause I'm still stuck drooling over the cookies. Thanks for the tut though. I've got a couple of small gifties this will be perfect for.
I am sorry I was not the "one" who requested these instructions. I am already making a list of gift ideas for next year and these are going on the list. Thanks
Thank you for saving me from sewing binding (binding which I would make!) around edges of the potholders I'm about to create. These will be gifts for friends coming over for a tree trimming party on Saturday. Your tutorial will make very quick work of this project. Salute!
Hi, I just found your directions and whipped up 3 but without the quilting! Just used squares of fabric! Turned out great. I am giving them as xmas gifts to my sister-in-laws. Thanks a bunch.
Post a Comment